Blog, Photoshop Tutorial
What are Photoshop Overlays?
What is a photoshop overlay? Great question! Photoshop overlays are an image or texture that is added to a photograph. They are an additional layer – much of which is transparent – on top of the photograph, in order to add effects that were not present when the photo was taken. Back in the early days of photography, photographers had to creature texture and special effects through strategies like overexposure, scratching negatives with pins or sandpaper, or staining the paper before exposure. Now, applying these effects is much easier! Overlays can be applied easily in Photoshop by dragging and dropping them onto the image!
Why use Photoshop Overlays?
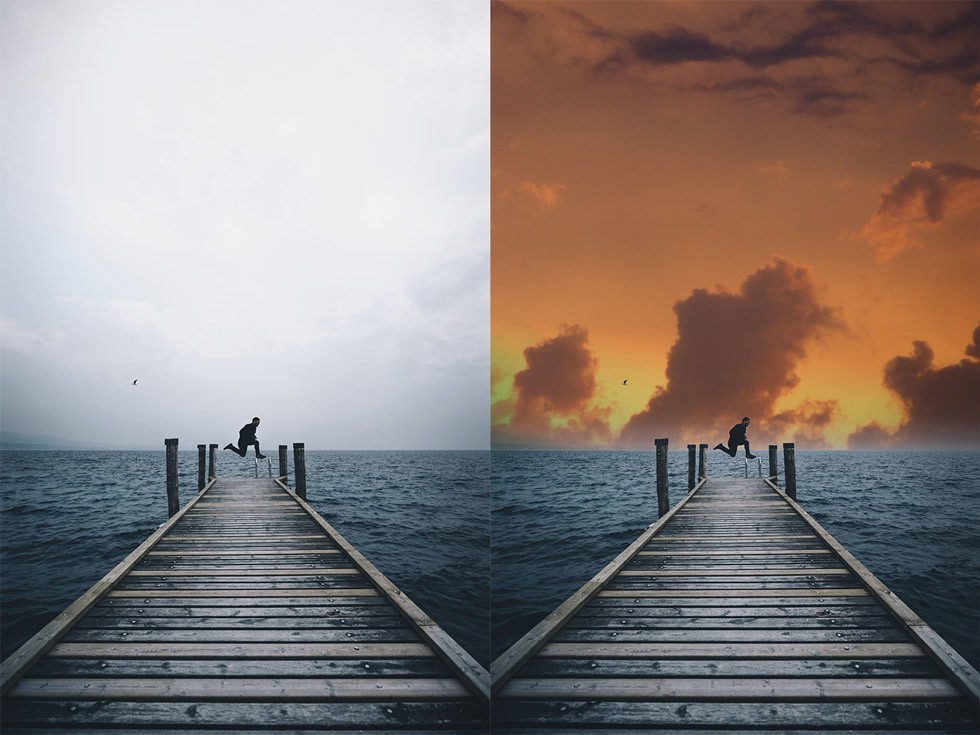
Overlays can add extra elements that were not there when the photo was taken, adding more character to the photo and creating a unique final product. There are countless possibilities when it comes to what Photoshop Overlays can add to your photos. They can add an effect in the foreground like snow or rain, or falling leaves or petals. They can change an aspect of the image, such as changing out a dull grey sky for a colourful sunset, or a clear, sunny day. Overlays can also create the appearance of camera effects like lens flare, light leak, and bokeh effects. They could also even add people or animals into the shot to create a composite image in cases when it would have been too dangerous or unrealistic to have the real thing on set. Overlays are a quick and easy way to achieve a huge variety of effects that would not have been possible to get otherwise!

How to Install and Use Photoshop Overlays
Photoshop Overlays don’t actually need to be installed like Actions or Presets, as they are just image files (in either JPG or PNG format) that are applied by layering that image over your original. Instead, you will simply open both image files (the overlay and the image you want to apply it to) and drag and drop the overlay on top of your photo!
See Also:
What is The Rule Of Thirds in Photography?
What are Shutter Speed, ISO, and Aperture?
What is the Focal Plane?
Follow the steps below to begin using your Photoshop Overlays:
Step 1: Start by saving your overlays in a folder you can find easily, and where you will remember putting them.
Step 2: Open the image you want to use your overlay with.
Step 3: From the “File” menu, select “Open”.
Step 4: From here, navigate to the folder where you saved your overlays, and select the one you want to use.
Step 5: Once you have clicked “Open”, your overlay file will be opened in a new tab in Photoshop.
Step 6: Click and hold on the image, then drag it over to the tab containing your original image. Release your mouse to drop the overlay on top of your image!
Step 7: Alternatively, you can use the “Place” option from the “File” menu. In this technique, you will simply select the overlay you want to use from your list of files. Then, when it appears on your image, you can adjust it to move it around or change the size, and then press enter on your keyboard to drop it into place.

Adjusting Your Overlays
Overlays are fairly easy to work with, and definitely much faster than adding all of these effects in by hand, on your own, but they are not a one-click fix! After you’ve applied your overlay, you will have to adjust it in order to get the final effect! Follow the steps below for ways you can adjust your overlays after they have been applied.
Step 1: Change the Blending Mode in your Layers panel to “Screen” by clicking the drop-down menu.

Step 2: Adjust the layer opacity. Some overlays will be much too opaque for certain photos, so as you change the opacity you will begin to see your own photo coming through, along with the effect you are hoping to achieve by using the overlay.
Step 3: You can also erase certain parts of the overlay if you do not want it applied to certain areas of your image (like faces, for example, or to make sure a sky overlay is only applied to the sky). This can be done by using “Layer Mask”. To do this, make sure your layer mask is selected in the “Layers” panel. Next, select your Paintbrush tool in the Tools panel and set the foreground colour to black. You may need to play with the opacity and hardness of your brush in order to achieve the right effect, but then, you can simply paint anywhere on your image you want the overlay to be erased!
Step 4: Continue to erase pieces of the overlay and adjust the settings until you have the final product you envisioned!
Once you know how to apply your overlays and how to adjust them to get the right look, the possibilities are endless! You will be able to add interesting textures, weather effects, and any other graphic to your photos to create a unique finished product and make your photos stand out!

