Digital Manipulation, Digital Photo Editing, Lightroom Tutorial
How to Use the Graduated Filter Tool in Lightroom
The Graduated Filter Tool in Lightroom is a very versatile one, and one that everyone should know how to use. Its purpose is to apply a range of effects on a certain section of your photo, in a gradual manner, as the name indicates. The effects of the graduated filter take place in a linear fashion, and are strongest where the filter begins, and then gradually taper off.
How to use the Graduated Filter Tool
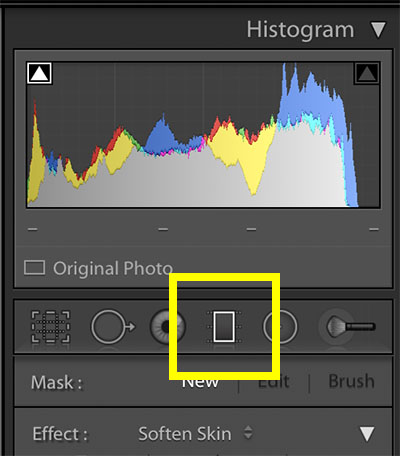
The Graduated Filter Tool is found in the Develop module, just below the histogram. You can also switch to the Graduated Filter Tool by pressing “M” on your keyboard.

Once you have selected the tool, you can apply the filter to your photo by starting at one edge of your photo, or wherever you want the filter to begin, and dragging it across your photo. To lock your filter perfectly vertical or horizontal, hold down “Shift” while you drag. When you have covered the area you want the filter to be applied to, release your mouse.
There is now a “pin” that shows where the centre of your filter is. If you want to shift the position of your filter, or change any settings at any point, simply select this pin. If you want to change the width of your filter, you can drag either of the outside lines on your filter. Changing the width of your filter will also change the hardness or softness of the graduation of your filter.
Keep track of where your filter is being applied by selecting “Show Selected Mask Overlay” below your photo. This will show your graduated filter in red! (You can change the colour of the overlay if the default red blends in with your photo too much!

Although the default is to apply the filter in a straight line, this does not always have to be the case! If you want to remove the filter from certain areas, click the brush at the top of the panel while your filter is active, select “Erase” in the brush panel, then with the mask visible, brush away the areas you don’t want your filter to be applied. You can also apply the filter to extra areas of you image by using the brush tool, but selecting “A” or “B” instead of “Erase”!


As you play with the hardness or softness of your filter, keep in mind that light will naturally scatter, which means there will not necessarily be a hard line. Let your effects transition over the ground/foreground a little bit for a softer line and more realistic look, rather than stopping the effect harshly at the horizon line.
After you have applied your filter, you can begin to change the settings. The Graduated Filter Tool offers the same adjustment tools as the Lightroom Brush Tool: Exposure, Brightness, Contrast, Saturation, Clarity, Sharpness, and Add Colour.
See Also:
How to Batch Edit Photos in Lightroom
How To Remove Noise And Grain In Lightroom
Lightroom CC vs. Lightroom Classic
As you adjust these settings, your changes will only be applied to the section that the Graduated Filter is applied to!

Keep adjusting settings until you have achieved the look you want! You can also apply multiple Graduated Filters to the same photo, if needed. For example, you may want to darken the sky, but lighten the foreground. In this case apply one filter to the top portion of your photo and adjust that one to get the sky effect you want, and then apply one to the bottom portion of your photo and adjust the settings to get the foreground effect you want!
If you find that you are applying the same settings to photos over and over, you can save your Graduated Filter settings as presets, so you can easily access and apply them. To do this, go down to the “Filters” drop-down menu in the bottom right corner of the screen.

From this menu, select “Save Current Settings as New Presets.” Simply your preset and click “Create”, and you are all set!

What is the Graduated Filter Tool used for?
Landscape Photos

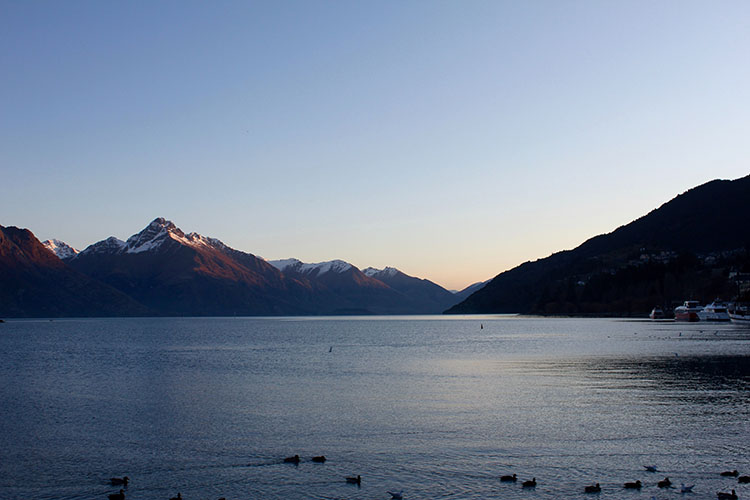
The most common application is to enhance the sky in landscape photos. In this case, you would apply a graduated filter across the top portion of your photo, which would then allow you to make adjustments to only the sky portions, leaving the rest unedited. This is helpful in situations when you may want a different exposure or different settings across various sections of your photo!
Just like you may want to darken the sky because it is overexposed, you may want to lighten the foreground because it is underexposed! To do this, simply apply the graduated filter to the bottom of your photo and make the adjustments in the same way you would for the sky. You can also darken the foreground, which can direct the viewer’s gaze to the horizon, which is generally the focal point of a landscape photo.
Making the Edges of Your Image Darker

Making the edges of your image darker may help to highlight your subject and draw your viewer’s eyes in towards your focal point. You can achieve this effect by using multiple graduated filters along the edges of your photo. Depending on the photo, you may choose to apply the filters vertically, horizontally, or both in order to outline your subject!
Adding a Colour Wash

The colour setting at the bottom of the graduated filter panel will allow you to add a tint to your filter. This colour will then be laid over your photo along with whatever other settings you choose to apply to your filter. One way you can use this is on photos that were shot at golden hour, as it will help you emphasize the warm golden tones that are already present in the photo. If you apply a graduated filter with a golden tint vertically across your photo, for example, you may be able to replicate the golden glow of the sunset, and create a really beautiful effect.
Of course, these are not the only ways you can use the Graduated Filter Tool in Lightroom! Once you have mastered how to apply the filter and know exactly what applying one will do to a photo, you can apply them to all different types of photos and get really creative with how you use them.

