Lightroom Tutorial
How to Use the Clarity Slider in Lightroom
When it comes to giving your images a bit more punch and impact, the Clarity slider is one of the most useful tools in Lightroom. This slider works wonders on portraits, landscapes, or basically any other image that appears to be a bit visually flat. Keep reading to learn exactly what the Clarity slider does, and how it could help improve your photos!
What does the Clarity slider do?
The Clarity slider increases the contrast in your photo, but in the mid-tones only. Unlike the Contrast slider, which makes both the shadows darker and the highlights lighter, the Clarity slider increases only the mid-tone contrast. This brings out the texture and finer details in your photo, and increases the apparent sharpness of your photo. As it only affects mid-tones, it is far less likely to wash out detail in areas that are already dark or already bright. While increasing the clarity will accentuate edges and details in your photo, you can also decrease clarity to get the opposite effect, and make your photo appear softer and a little hazy.
How to Use the Clarity Slider
1. Making Global Adjustments
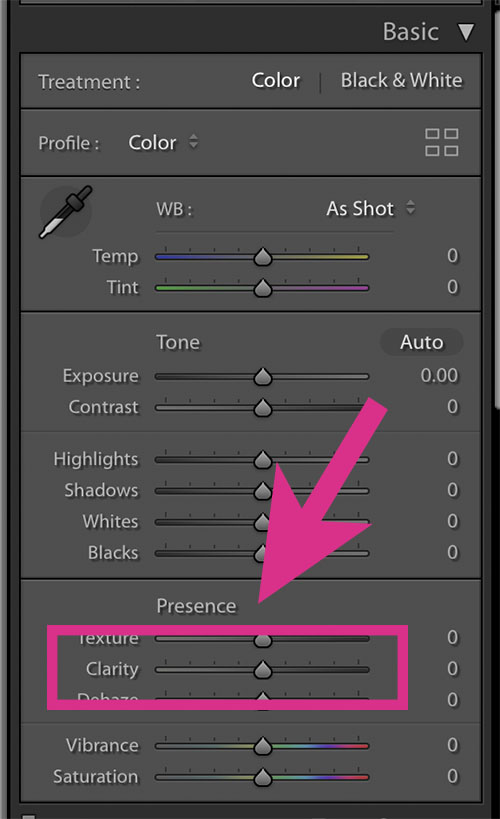
If you want to make global adjustments (affecting the entire photo) to the Clarity in your photo, the simplest way is to adjust the Clarity slider found in the Basic Panel. Simply move the slider to the left (to decrease Clarity) or the right (to increase Clarity) to achieve the results you are looking for.

2. Using the Brush Tool
There may be times when you don’t want to adjust the Clarity in your whole photo, but just want to apply it to certain areas. To do this, select the Brush tool in the Develop module. Move the slider to reflect the settings you want to apply, then simply brush over the areas you want to adjust! To make your work even easier, you can try using the Auto Mask Tool. This tool automatically detects boundaries within your photo, helping you “paint inside the lines”.
If you want to see exactly where you’ve applied your adjustments, select “Show Selected Mask Overlay”. This will highlight in red all the areas your brush settings have been applied!

3. Using a Radial Filter
This filter is faster than the Brush tool, but you are limited to areas that fit the shape of the filter. To use a Radial Filter to adjust Clarity, the first step is to select the Radial Filter tool in the Develop Module. Then, click and drag the filter over the place you want your adjustments to be applied. To make the effect look more natural, you should feather the edges of the filter by increasing the value on the Feather slider. Finally, increase or decrease the Clarity using the sliders until you have achieved the desired result!

Four Ways to Improve Your Photos Using the Clarity Slider
1. Emphasize Texture in the Whole Photo
Photos that have a lot of texture may benefit from a larger increase in Clarity to further accentuate the texture and detail. This technique is especially effective when editing black and white photos.
2. Emphasize Texture Locally
Using the brush tool or radial filters, bring up the Clarity in specific areas of your photo in order to emphasize texture, but only in certain areas. By bringing up the Clarity in some areas and not bringing it up in others, you can create a strong focal point in your photo. The viewer’s eye automatically goes to the sharp areas of a photo before the out of focus ones. Use Clarity to draw your viewer’s eyes to the most important area of your photo!

3. Emphasize Facial Features in a Portrait
The Clarity slider can be used to increase detail in a person’s eyes and lips. Highlight your subject’s best features by increasing the Clarity!
4. Soften Skin
This is one area where you may want to decrease the Clarity. Use the brush tool to bring down the clarity in these areas. When softening skin, the most effective way to do so is to increase the sharpness at the same time that you are decreasing the Clarity.
Lightroom also has a built in brush for this called “Soften Skin”. Use this preset as a starting point, and then adjust the sliders to get the effect you want.
The Clarity slider offers endless possibilities and can really help improve the look of your photos! Don’t be afraid to get creative and experiment with the Clarity slider and see what your photos look like with emphasized or de-emphasized texture. You might end up loving the results!

