Lightroom Tutorial, Uncategorized
How to Use Lightroom’s Texture Slider
Jul
The Texture Slider is the most recent addition to Adobe Lightroom’s set of photo-editing tools, and will definitely be helpful to photographers and editors everywhere. The Texture slider is designed to increase or decrease the appearance of texture in a photo while still retaining fine details.
How does the Texture slider work?
This slider was developed not with the idea of adding texture, but taking it out, with the goal of migrating some of the skin retouching powers of Photoshop into Lightroom.
Moving the Texture slider to the left will reduce medium size details – which is useful for minimizing skin texture or smoothing surfaces – while moving the slider to the right will enhance these medium-size details – which is useful for intensifying texture of foliage or hair.

To apply Texture selectively, choose one of the local adjustment tools (graduated filter, radial filter, or adjustment brush) from the menu on the right, move the Texture slider to get your desired result, and then apply!
The Texture slider is perfect for when your photo has large areas of mid to low-frequency features that you want to adjust, you want a more subtle enhancement, for portraits, and in photos with extreme colour contrast or saturation.
How is the Texture slider different from Sharpening or Clarity?
Although these sliders may seem like they do essentially the same thing on the surface, they actually produce very different results.
The Sharpening slider affects the edges and the finest details of your photo. For example, if you had a landscape photo and wanted extra definition in the shrubs or foliage, turning the sharpening way up would causes tons of extra noise in your photo and overwhelm any detail that may have been added. With the Texture slider, you can enhance the detail in the foliage in your image, and noise will be largely unaffected, giving you a clearer image and better results overall.
Clarity interacts with our photos by increasing or decreasing the contrast between mid-tone luminance values. This gives the illusion that the photo is becoming clearer. You will notice that the photo is perceptively brighter and that the colour saturation decreases slightly. Clarity is useful when you want to apply the effect across your entire image, or in black and white photos. With the Texture slider, you can edit the mid-frequency details with much more precision, and get much more subtle results.
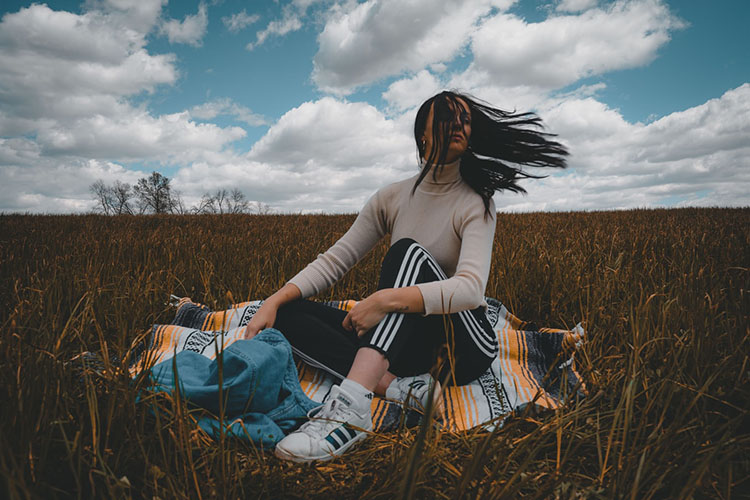
For example, in the portrait above, the Texture slider is the perfect tool to smooth out the subject’s skin, and increase the detail in her hair, without creating noise, or affecting other details in the photo!
The Texture slider opens up a whole new list of possibilities! With this slider, you can get much more subtle adjustments than you could with the Clarity slider, and may be able to do some of the portrait editing you would have had to do in Photoshop, saving you precious editing time! The possibilities are endless, so try this slider on some of your photos and see where it takes you! Don’t be afraid to get creative and try new things!