Digital Manipulation, Digital Photo Editing, Lightroom Tutorial, Photography, Photography Tutorial
How To Remove Noise And Grain In Lightroom

Dec
Photography can be a very stressful business. Lets say you just finished an amazing shoot and in-camera all your photos look amazing. You get home, upload the photos to Lightroom and distraught falls over your face because all of your images are noisy or grainy! This happens to a lot of photographers, from new beginners to even the most experienced veteran. Thankfully Lightroom has a set of quick and simple functions to remove grain and noise from your photographs.
What is Noise And Grain in Photography?
Noise or grain in photography is caused when the camera sensor has to over compensate for the lack of light available. Grain is also often a reference to film photography; the higher your ISO when using film, the more grain. This can often be a preferred style of photography but is not always useful in portfolios for professional use. The noise and grain on an image can often reflect something like television static. Sometimes noise and grain can cause an image to lose its focus and create an image that is not sharp. It can be important to aim for a photograph without grain or noise, then if you would like it, you can add it in post-processing.

What Causes Noise And Grain?
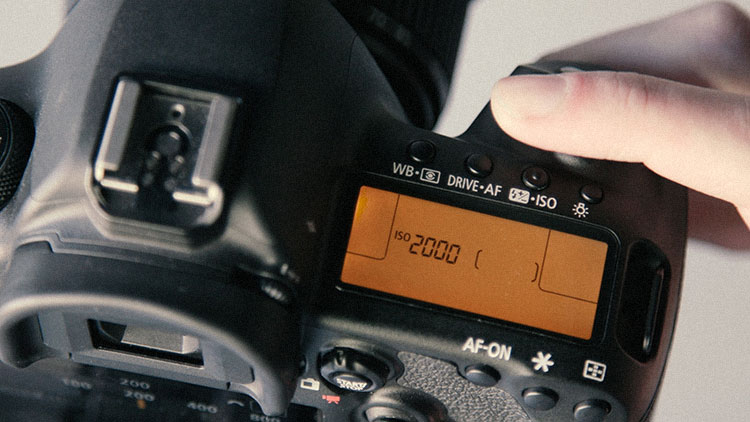
Digital noise or grain is usually caused when shooting in low light situations, but this doesn’t mean it cannot occur in perfect lighting if you are not careful with your settings. The biggest culprit causing digital noise or grain is a high ISO. In low light situations, it is hard to avoid using a high ISO, but it is not impossible.
See Also:
Quick Tips to Make Your Workflow More Efficient in Lightroom Classic
How To Make a Background White in Photoshop
How to Achieve Bokeh Effect
How to Avoid Shooting at a High ISO
There are a few ways you can make sure you are not shooting at a high ISO and avoid causing grain and noise in your photographs. First, use a flash, either using the built-in flash or an external flash or lighting set up. This can be an expensive process and not very likely to work for beginner photographers. You can also try shooting at a lower shutter speed. This will allow the image sensor to stay open longer thus allowing in more light to compose your image. For handheld photographers this can be a tough act as it may cause some motion blur, use a tripod or level surface to keep your camera still. Another tip for eliminating high ISO is shooting with a low aperture, this makes the sensor larger, allowing more light in. Most zoom or telephoto camera lenses only allow you to shoot as low as 3.5-5.6 F stop, this is a fixed aperture range. Prime lenses have lower ranges of F stop from 1.2-2.8. By shooting at a lower F stop you will create a deeper depth of field. This means that only your subject will be in focus and the background will have a smooth blur so be mindful of this.
Shoot using manual settings as best as you can, otherwise the camera will compensate for you. You can shoot in either aperture or shutter priority without having auto ISO. If you would like to shoot in auto ISO, set the maximum ISO in your camera to a low range. For more information on how to set auto ISO check your camera’s manual. Stay away from using fully automatic settings as your camera will over compensate.
How To Remove Noise And Grain in Lightroom
The first thing to do when removing noise or grain in Lightroom is to import your image and move to the Develop tab. Once you are in the Develop tab, move over to the left toolbar and use the navigator tool to zoom in on a 1:1 ratio.

Now that your image is open and zoomed in, determine which type of digital noise you are dealing with. The first type of noise is colour noise, which occurs when colour pixels are scattered throughout the image. You can easily decipher this if your image has pixels of red, blue and green across the photo. The next type of noise is standard digital noise, this typically just makes your image look as if it is grainy and out of focus.
Lightroom Detail Tab
Using the right toolbar, scroll down until you reach the Detail panel and open this up!

Noise Reduction vs. Colour Reduction
For standard digital noise reduction, use the Luminance, Detail, and Contrast sliders. Luminance will smooth out the pixels and get rid of overall noise. Detail will save the details in your image, and higher you slide it the more detail will be saved. Contrast determines which pixels to smooth out in relation to the contrast of your image.
For colour noise reduction use the Colour, Detail, and Smoothness sliders. Colour will change the blue, red and green pixels to a neutral tone. This is determined by using proximity-match, meaning it uses colours around it to determine the proper grading. The Detail slider does the same thing in this case as it does when you are reducing digital noise: preserves the details in your photo. Smoothness is similar to what the Luminance slider does. This slider smooths out the colours and pixels to reduce the grain and noise.

The objective of a final image is not to be completely smooth. You want to remove the most amount of noise and grain in Lightroom as possible, without losing detail. Don’t be upset if your photo still has a little noise, it’s better to keep detail rather than smooth the entire image. Always remember to shoot in RAW so that your file has enough information to edit it properly.
When you are finished editing, export your photos properly, using an image resolution of 72ppi for Facebook and other social networks. Use 300ppi if you are going to be printing your photo. Just because your photos seem unredeemable at first does not mean they are, always look to bring life back into your images!