Digital Manipulation, Digital Photo Editing, DSLR Cameras, Lightroom Tutorial, Photography, Photography Tutorial, Photoshop Tutorial
How To Make a Background White in Photoshop
Entering the world of product and wedding photography can be an expensive venture. The gear you may think you need can take a large toll on your bank account. A useful tool in these situations is having a neutral backdrop to create focus on a certain product or detail. For someone looking for an accurate and professional way to do this, Adobe Photoshop is the best program to use. The use of layer masks and overlays in Photoshop allows the user to manipulate and make a background white.
Layer Mask
The layer mask tool in Photoshop is an extremely powerful asset for editing photographs without causing irreparable damage to your file. A layer mask creates a selection of your choice and allows you to manipulate only that selected area while leaving the rest untouched. This is a great way to change a photograph and add a white background in photoshop.
Creating A Layer Mask in Photoshop:
Step 1: Opening A New File In Photoshop
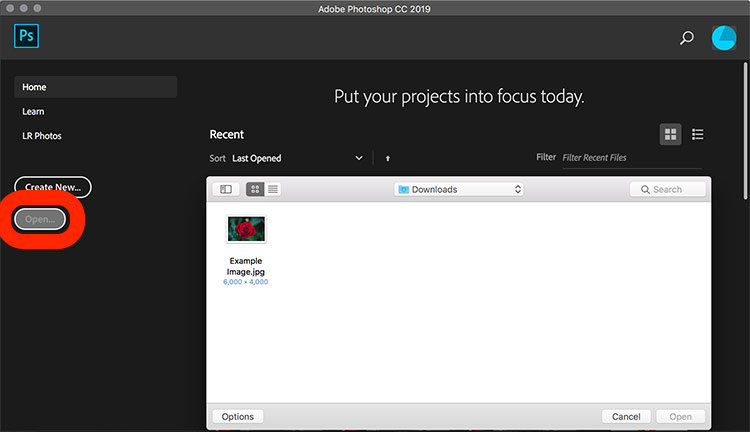
Open Photoshop on your desktop and locate the photo you would like to manipulate.
Step 2: How To Make A Selection In Photoshop
After opening your file you can make your selection of what you would like to KEEP from the image. This is done by either using the magic wand tool or selection tool to create a selection. Another way of doing this can be by outlining your selection with the pen tool. Once you’ve made your outline press CTRL+ENTER (PC) or CMND+ENTER (Mac) on your keyboard to turn this into a selection marquee.

Step 3: How To Select And Mask In Photoshop
Once you have a rough marquee selection of what you would like to keep in the image you can now mask! In the top tool bar a few options will appear. Move your cursor over and choose the option that says “Select and Mask”.

Step 4: How To Adjust Edge Detection In Photoshop
The photo will open in the Mask editing window. The content that is changed to a red is the elements of your image that will be deleted or hidden from the final image.
Step 5: How To Refine A Mask Selection In Photoshop
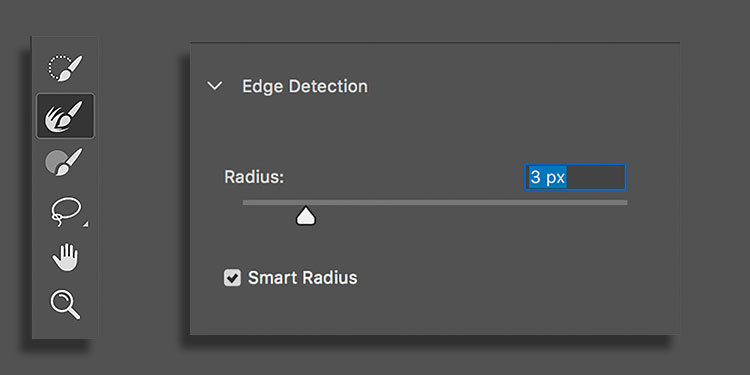
You can refine your mask selection in this window by using the brushes displayed on the toolbar located on the left side of the window. You can also have Photoshop assist with the fine areas of the image by adding a Smart Radius selection on the right drop-down menu. This will also allow Photoshop to automatically fill in any areas around the edges of your selection which may be slightly obscure.

See Also:
How To Crop And Straighten Photos In Lightroom
How To Remove Noise And Grain In Lightroom
The Lightroom Trick That Will Save You Hours!
Step 6: How To Create A New Layer With Mask In Photoshop
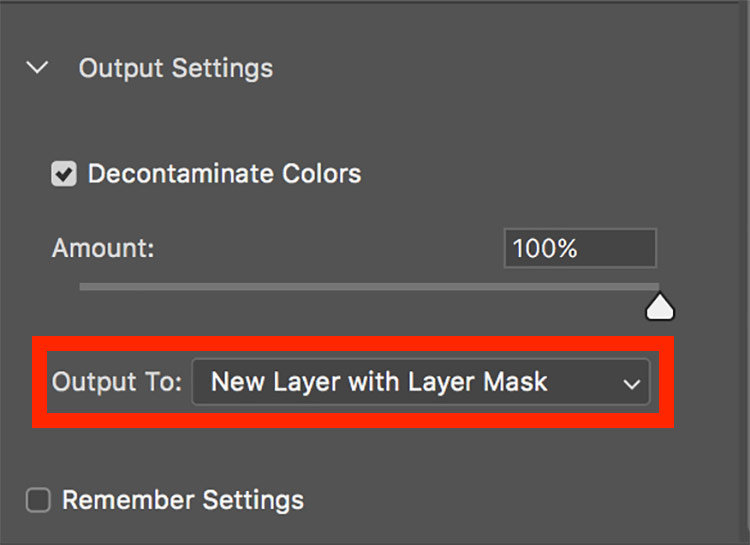
Once you have refined your selection it is time to create your layer mask! If you scroll down the menu on the right side of your window it will lead to an area titled ‘Output Settings’. In this drop-down menu, it is important to select “Output To: New Layer with Layer Mask”. This will ensure that your mask will appear as a new layer so that if anything goes wrong you can just delete this layer and start again. Otherwise you will have to go undo everything that was done manually!
Step 7: How To Add A New Layer In Photoshop
Finally you have a layer mask! With this new layer mask, the next step is very simple: create a layer and fill it. Press SHIFT+CNTRL+N or SHIFT+CMND+N to create a new layer.

Step 8: How To Fill A Layer In Photoshop
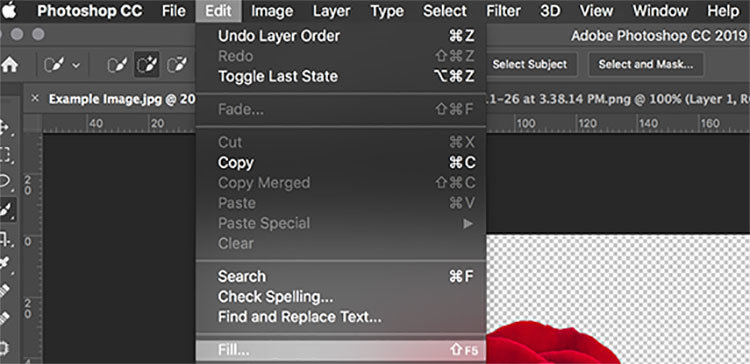
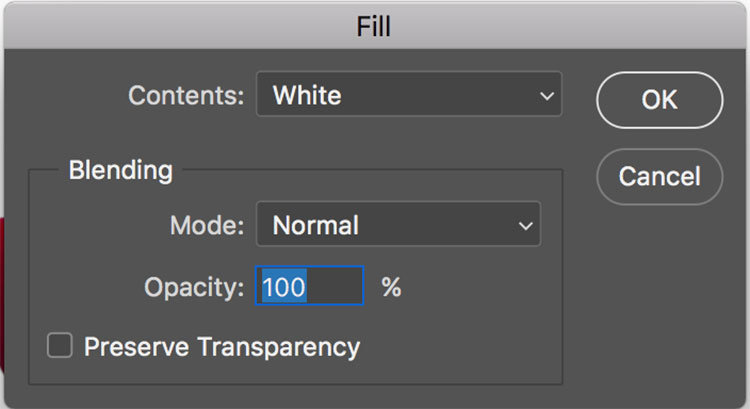
After you’ve created a new layer it is time to fill! On the top tool bar use your mouse to hover over EDIT, then from that drop-down menu select FILL.
Step 9: How To Select A Fill Colour In Photoshop
This will open a new window of options. Here, you can fill your background with White or any colour of your choosing. Use the drop-down menu to select your colour of choosing or no colour at all. Make sure the opacity is at 100% and the blend mode is set to normal, this will ensure a solid colour is displayed.
Step 10: How To Adjust A Background Layer In Photoshop
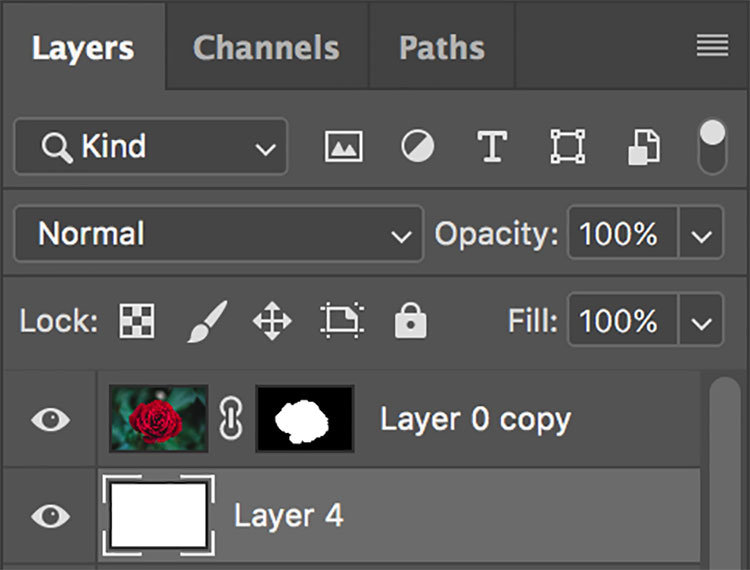
You now have your layer mask and your background layer filled with white. The final step is to make sure the background layer is placed under the mask layer. This will ensure that your background is being placed under your masked selection and not over top of it.
Finished Product
Voila! You now have a layer masked image with a plain white background!

The layer mask tool can be a very powerful asset when working in photo manipulation in Photoshop. Besides changing a background to white in Photoshop, there are many different possibilities when utilizing the tools outlined. The action of creating layer masks in Photoshop and changing a background can be partnered with our tutorial on Overlays in Photoshop. Being creative in this world means manipulating the mind of your viewers, don’t stop at changing a background to white, push the boundaries and create something EPIC!

