Digital Photo Editing, Lightroom Tutorial, Photography, Photography Tutorial
How To Crop And Straighten Photos In Lightroom
Using a tripod or monopod can be a fantastic way to get a clear and straight photograph. Sometimes this gear can be expensive and unavailable in tight situations. Post processing is an amazing way to crop and straighten photos and Lightroom has made this to be seamless. Being able to crop and straighten your photos in Adobe’s Lightroom is a major step and can be paired well with our tutorial on resizing images in Lightroom.
It is important to understand that cropping and resizing images are not the same thing. Cropping an image will create a selection and cut out everything else from your image. Resizing an image changes the actual dimensions of the photograph and is usually done in the exporting stage of post-production.
To crop and straighten in Lightroom is an easy task and does not damage the original image file. Rather, this creates a set of rules that Lightroom follows once exporting the final product. You can always undo any changes to your photo by going into the top toolbar, select EDIT > Undo Changes. This can also be achieved by using the keyboard shortcut CTRL+Z (PC) or CMND+Z (Mac). Another safe way of making these changes while keeping the original folder is by creating a virtual copy. To create a virtual copy of your image right click on the selected image in Lightroom, scroll down on the drop down menu until you find Create Virtual Copy.
Crop & Straighten Photos in Lightroom Tutorials:
- Locating The Crop Tool
- How To Use Manual Crop in Lightroom
- How To Adjust The Aspect Ratio
- How To Use Automatic Straighten in Lightroom
- How To Adjust The Angle Slider in Lightroom
- How To Use The Ruler Tool in Lightroom
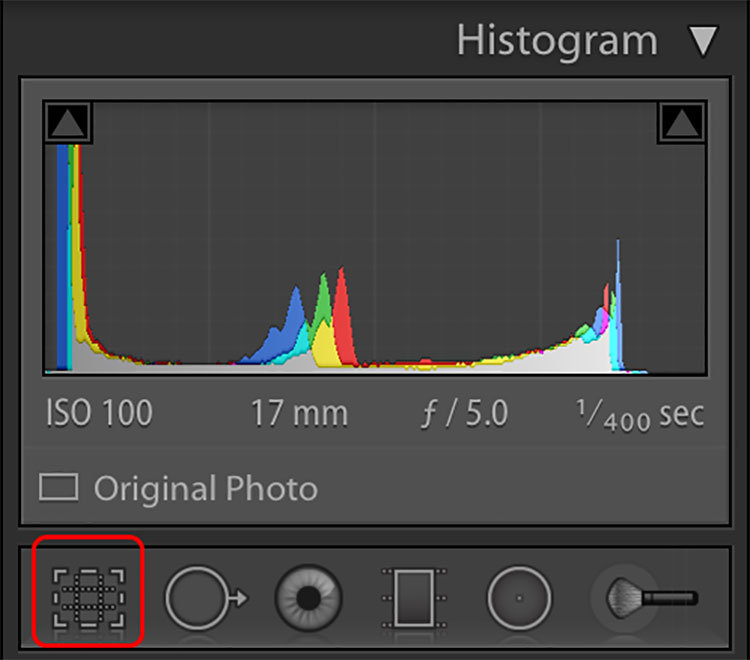
Accessing the crop tool in Lightroom is simple. First you must be in the Develop module, do this by selecting on the top toolbar or by pressing D on your keyboard.

You can find the crop tool on the right toolbar, it is the rectangle icon with the dashes crossed through it. The crop tool can also easily be accessed by pressing R on your keyboard. Once this is done, your image should have new borders around it. You will also find the crop and straighten drop down menu will show in the right toolbar.

How To Use Manual Crop in Lightroom:
To use an easy crop feature you can take the points in the crosshairs and drag them inward or outward to create a crop overlay. This option is very quick but is not guaranteed to have a perfect aspect ratio. You may adjust them this way and find that it is the quick, simple adjustment required for your image to be perfect! A good way to know how you should be cropping your image is by understanding exactly what the focal plane is and how you can focus on your subject.

How To Adjust The Aspect Ratio:
A more precise way of knowing the physical dimensions of the crop you are performing in your photo is by using Aspect Ratio. To avoid distortion especially when printing images make sure the crop is the same aspect ratio as the final image size. This means that if you are looking to print an image at 8″x10″ the crop ratio should be 8:10 or 4:5.
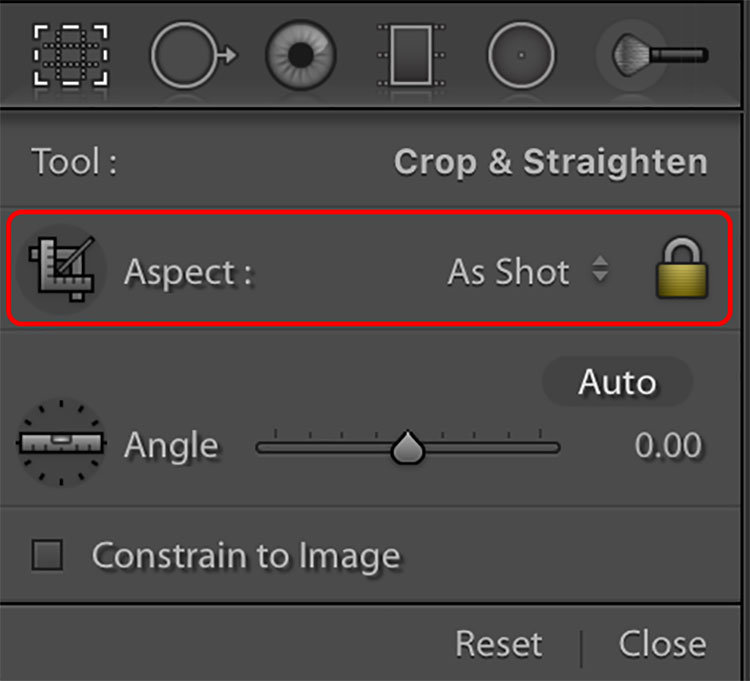
Changing the aspect ratio before printing will ensure there is no loss in pixelation and overall quality of the final image. To access this feature, you must have the crop dropdown menu open and then you can select aspect ratio dropdown feature. The aspect default might appear as “As Shot” or “Original” which is just the ratio that photo is at already. This will show options of commonly used aspect ratios as well as give you the option to customize.

How To Use Automatic Straighten in Lightroom:
Straightening an image in Lightroom is as simple as the press of a button. Literally, you can click AUTO and have Lightroom straighten the image for you. This tool can be quite accurate if there is a clear line that Lightroom can use as a guide to straighten. Even though it is the easiest option, it may not be the right option. The photographer is the only one who really knows how to compose their photos.

See Also:
How To Master Golden Hour Photography
How to Resize Images in Lightroom
Lightroom CC vs. Lightroom Classic
How To Adjust The Angle Slider in Lightroom:
To take full control over how Lightroom straightens your image, you must first enter the crop mode. Once in crop, the photo will again appear with an outline. Toggle over the corners to be prompted by the option to turn your image. This is a quick and simple way of straightening the image and is dependant on the photographer’s eye. You can also achieve this effect by simply adjusting the ‘Angle’ slider found in the dropdown menu.
How To Use The Ruler Tool in Lightroom:
Another quick and simple way to straighten an image is by using the ruler tool in the dropdown menu. This is the small ruler icon that has a dial around it. Once you’ve selected the ruler you can use it to plot a point at whichever ends of your photograph, Lightroom will take this line and straighten the image accordingly. This tool is very useful if you can clearly define the angle you wish to achieve. If shooting landscape photography, your angle should be in line with the horizon.

Final Process
Lightroom post-production in photography is a great asset and skill allowing the user to create the perfect composition with the images you have. Learning to crop and straighten your photos in post can save a lot on time and money as this removes the need for a zoom lens and/or a tripod. To ease the headache of editing a large set of photos individually check out our blog post on How To Batch Edit Photos in Lightroom. As well, you can find some tips on Exporting Lightroom Photos for Facebook, use these tips to have your images looking beautiful from import to export.

